
What I watched:
Getting Started with Adobe Audition – Complete Beginner Tutorial
https://www.youtube.com/watch?v=sBwKEBVeH-w
After learning about Adobe Audition, I went straight to YouTube and searched for a tutorial on it. This tutorial, as its name suggests, is a comprehensive beginner’s guide that takes you through the very basics of Adobe Audition. It showcases the UI and workspaces, explaining the basic tools you need to know to start working on your own sound projects. There’s not much to it conceptually that I could put down as a reflection other than the only sort of unexpected takeaway that they talk about at the very start of the video, which is to use a microphone with an XLR connection to get the most out of the powerful sound editing tools within Audition.
Up to the Brink:
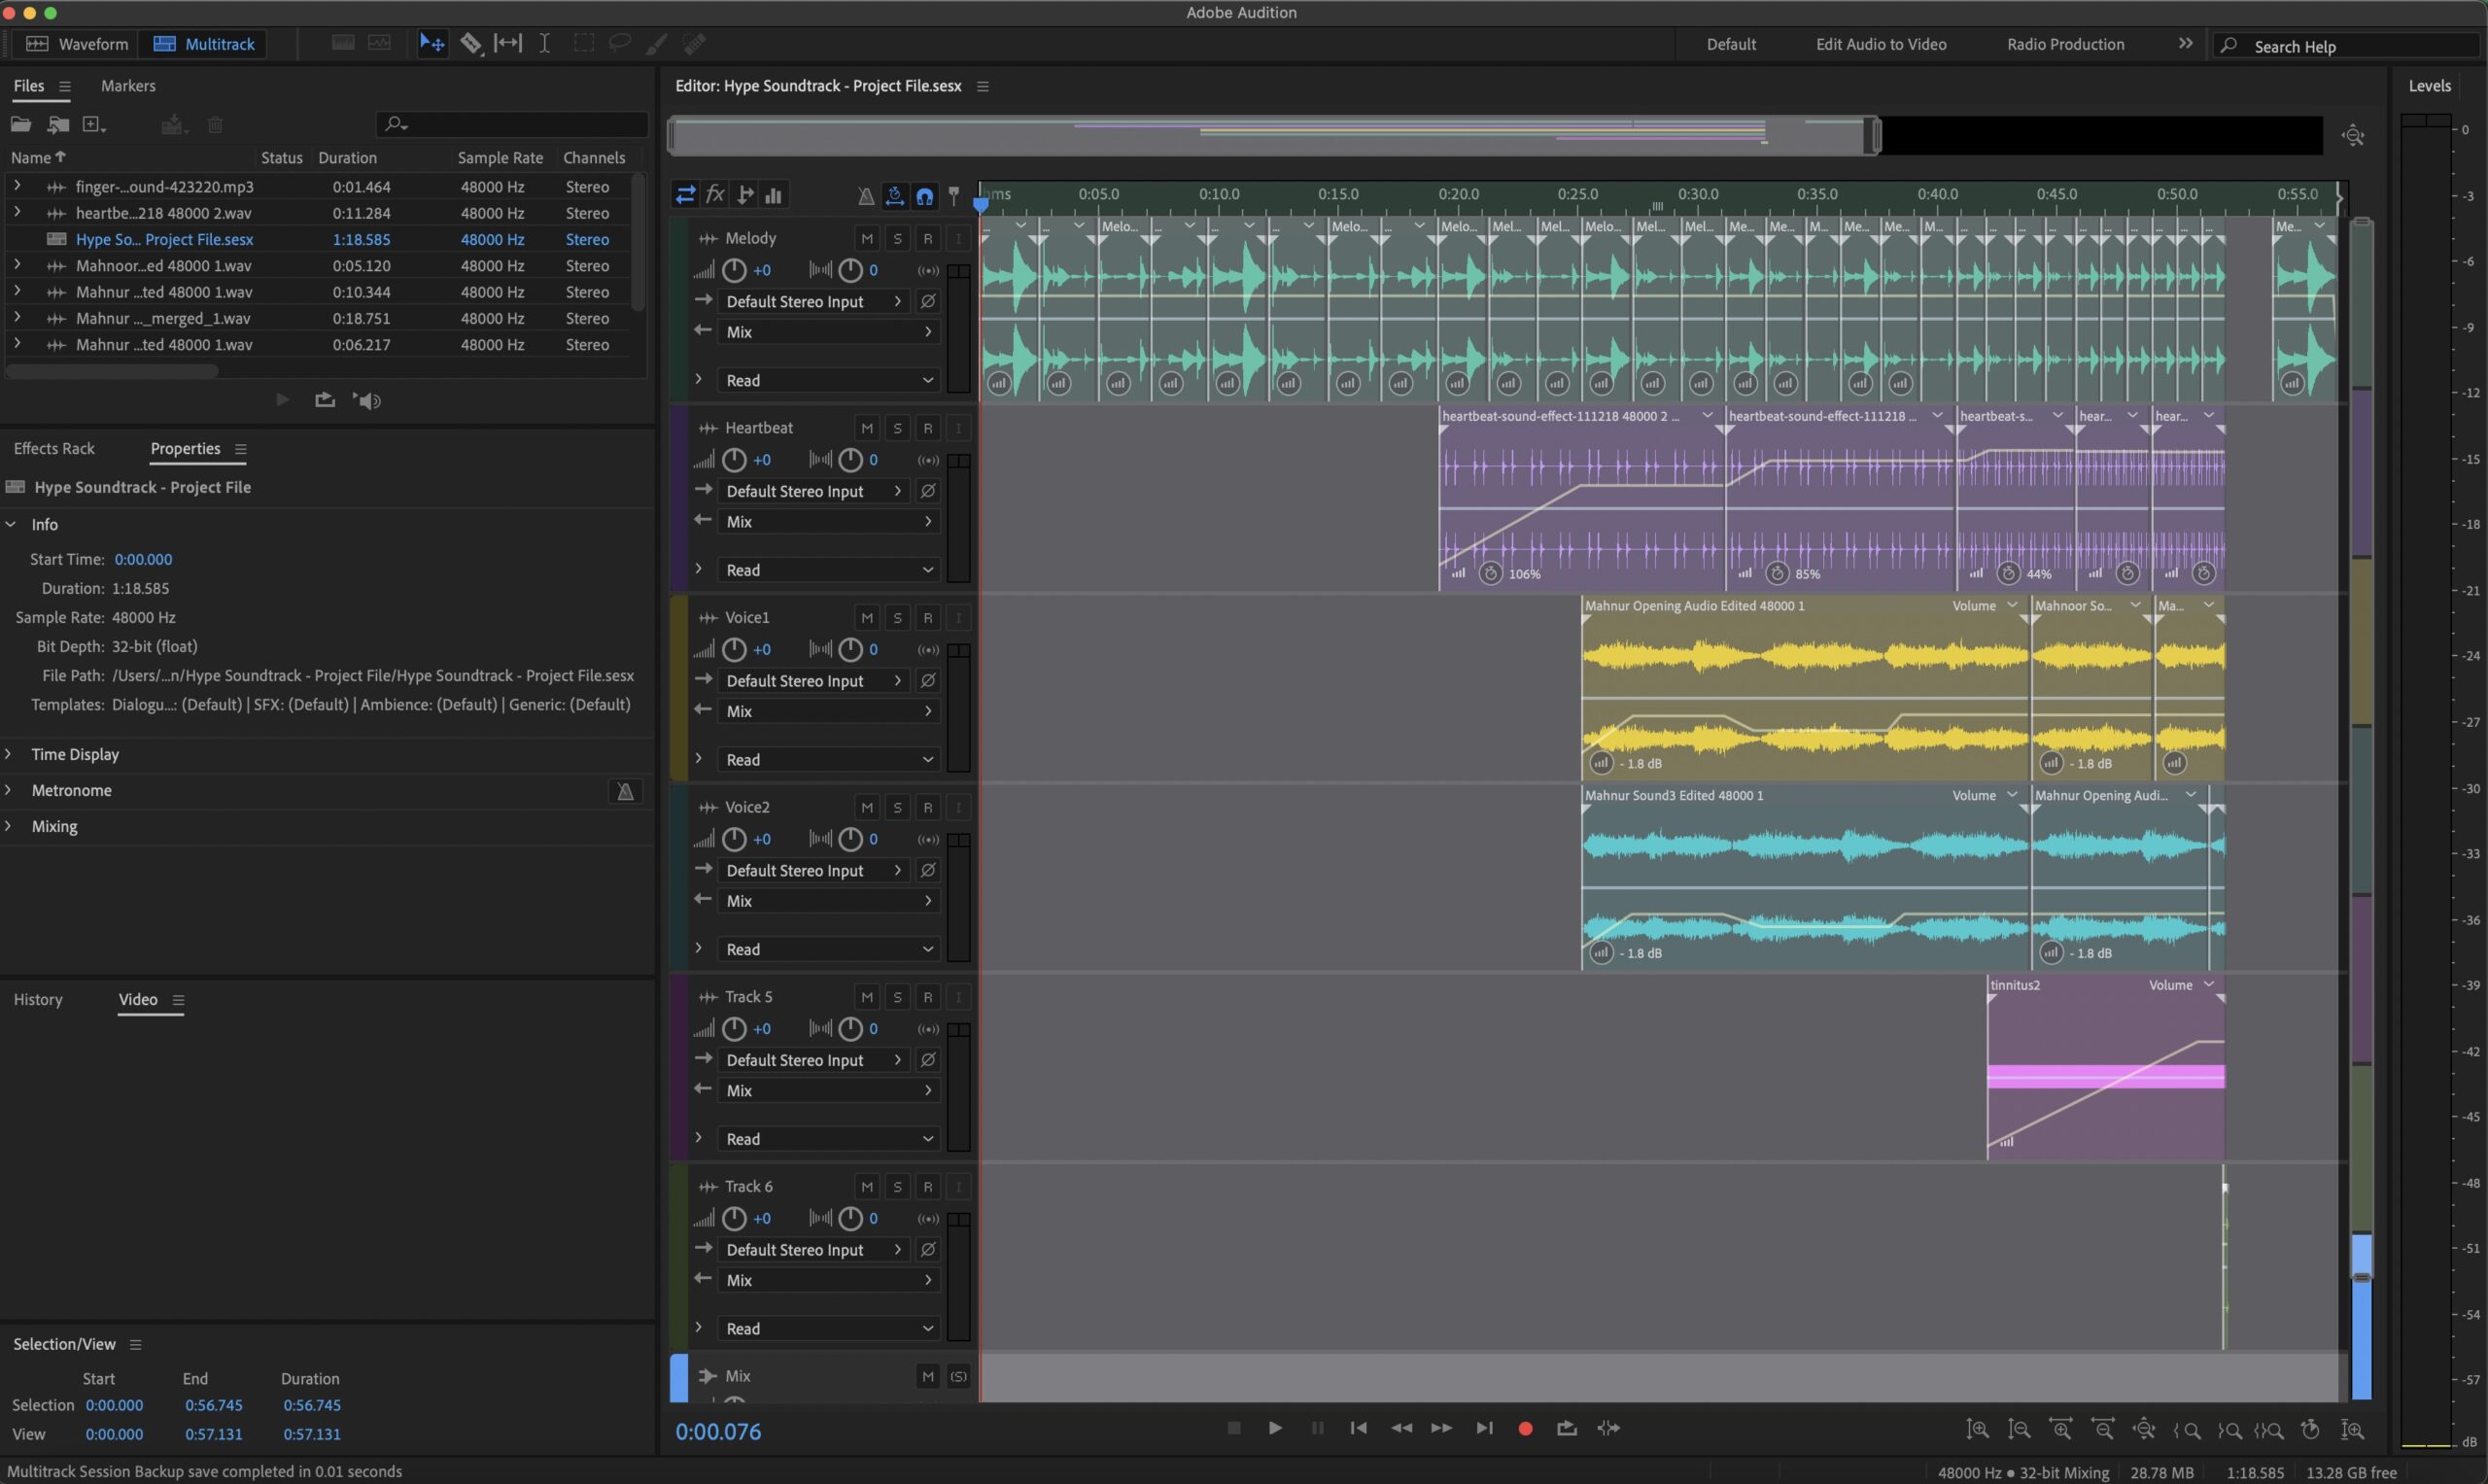
After recording and collecting all the sounds I needed, I started putting them all together in Adobe Audition. I started from the ukulele melody. At first, my plan was to use the complete melodies that I use in my thematic soundtrack, but upon listening to them, I realized what I was thinking was to use ONE melody, but all four chords. I was thinking of chords but kept calling them melodies. To clarify, there are three melodies in my thematic soundtrack: A, B, and C. Each melody has four chords: C, G, Am, and F. For this hype track, I was thinking of using ONE melody with the four chords. So, I took melody A, which is the primary melody, and used its chord progression: C-G-Am-F. As I was putting it all together, I had to make changes to what my initial plan was, as mentioned in last week’s blog post. It wasn’t drastically different. I just got rid of the heavy breathing sound, had the first melody play twice on normal speed to build the rhythm before diving into the speed changes, and I added a “snap” sound to emphasize the beat drop at the end. I worked in layers, compiling one layer at a time. After the melody layer, I put in the heartbeat layer. Doing that, I realized that I needed to prolong the last part of the melody before the snap/beat drop. So, I expanded that part a little more. The heartbeat also speeds up towards the climax, as does the melody, which also becomes monotonous with chords dropping one by one. Once I was happy with the way the melody and heartbeat sort of synchronized, I added the muffled voices. For this track, I used the same voices I had in my cinematic montage. The reason I used those was to create a connection to the entire experience and to tie the theme of hearing similar voices a little more. However, I do wonder if that makes the voices become a focus of being a specific problem or trauma that the character might be experiencing. I think I would have to think about that more, and maybe I can form a narrative around that as well. The voices are overlapping within themselves. What I mean by that is that I have three recordings, let’s call them X, Y, and Z. I put them in the order: Y-X-Z. I created a second layer, and I put the recordings in the order: X-Z-Y. This way, the voices are a mix of comprehensible and gibberish noise. You can understand parts of it, and other parts become gibberish noise, clear enough to realize that it is someone speaking, but not clear enough to understand what is being said. I think that sends out a message, but also creates a mystery where you can’t really understand what the role of those voices might be. After putting those voices in, I put the same tinnitus sound I had in my cinematic montage, once again tying to the theme. The tinnitus builds up as it starts taking over the entire sequence until the beat drop snaps you out of it into complete silence. After a few seconds of silence, I play the first part of the melody to give it a fairly smooth ending, so it doesn’t feel abrupt and jagged, and instead feels more like a complete soundtrack.
Narrative in the making:
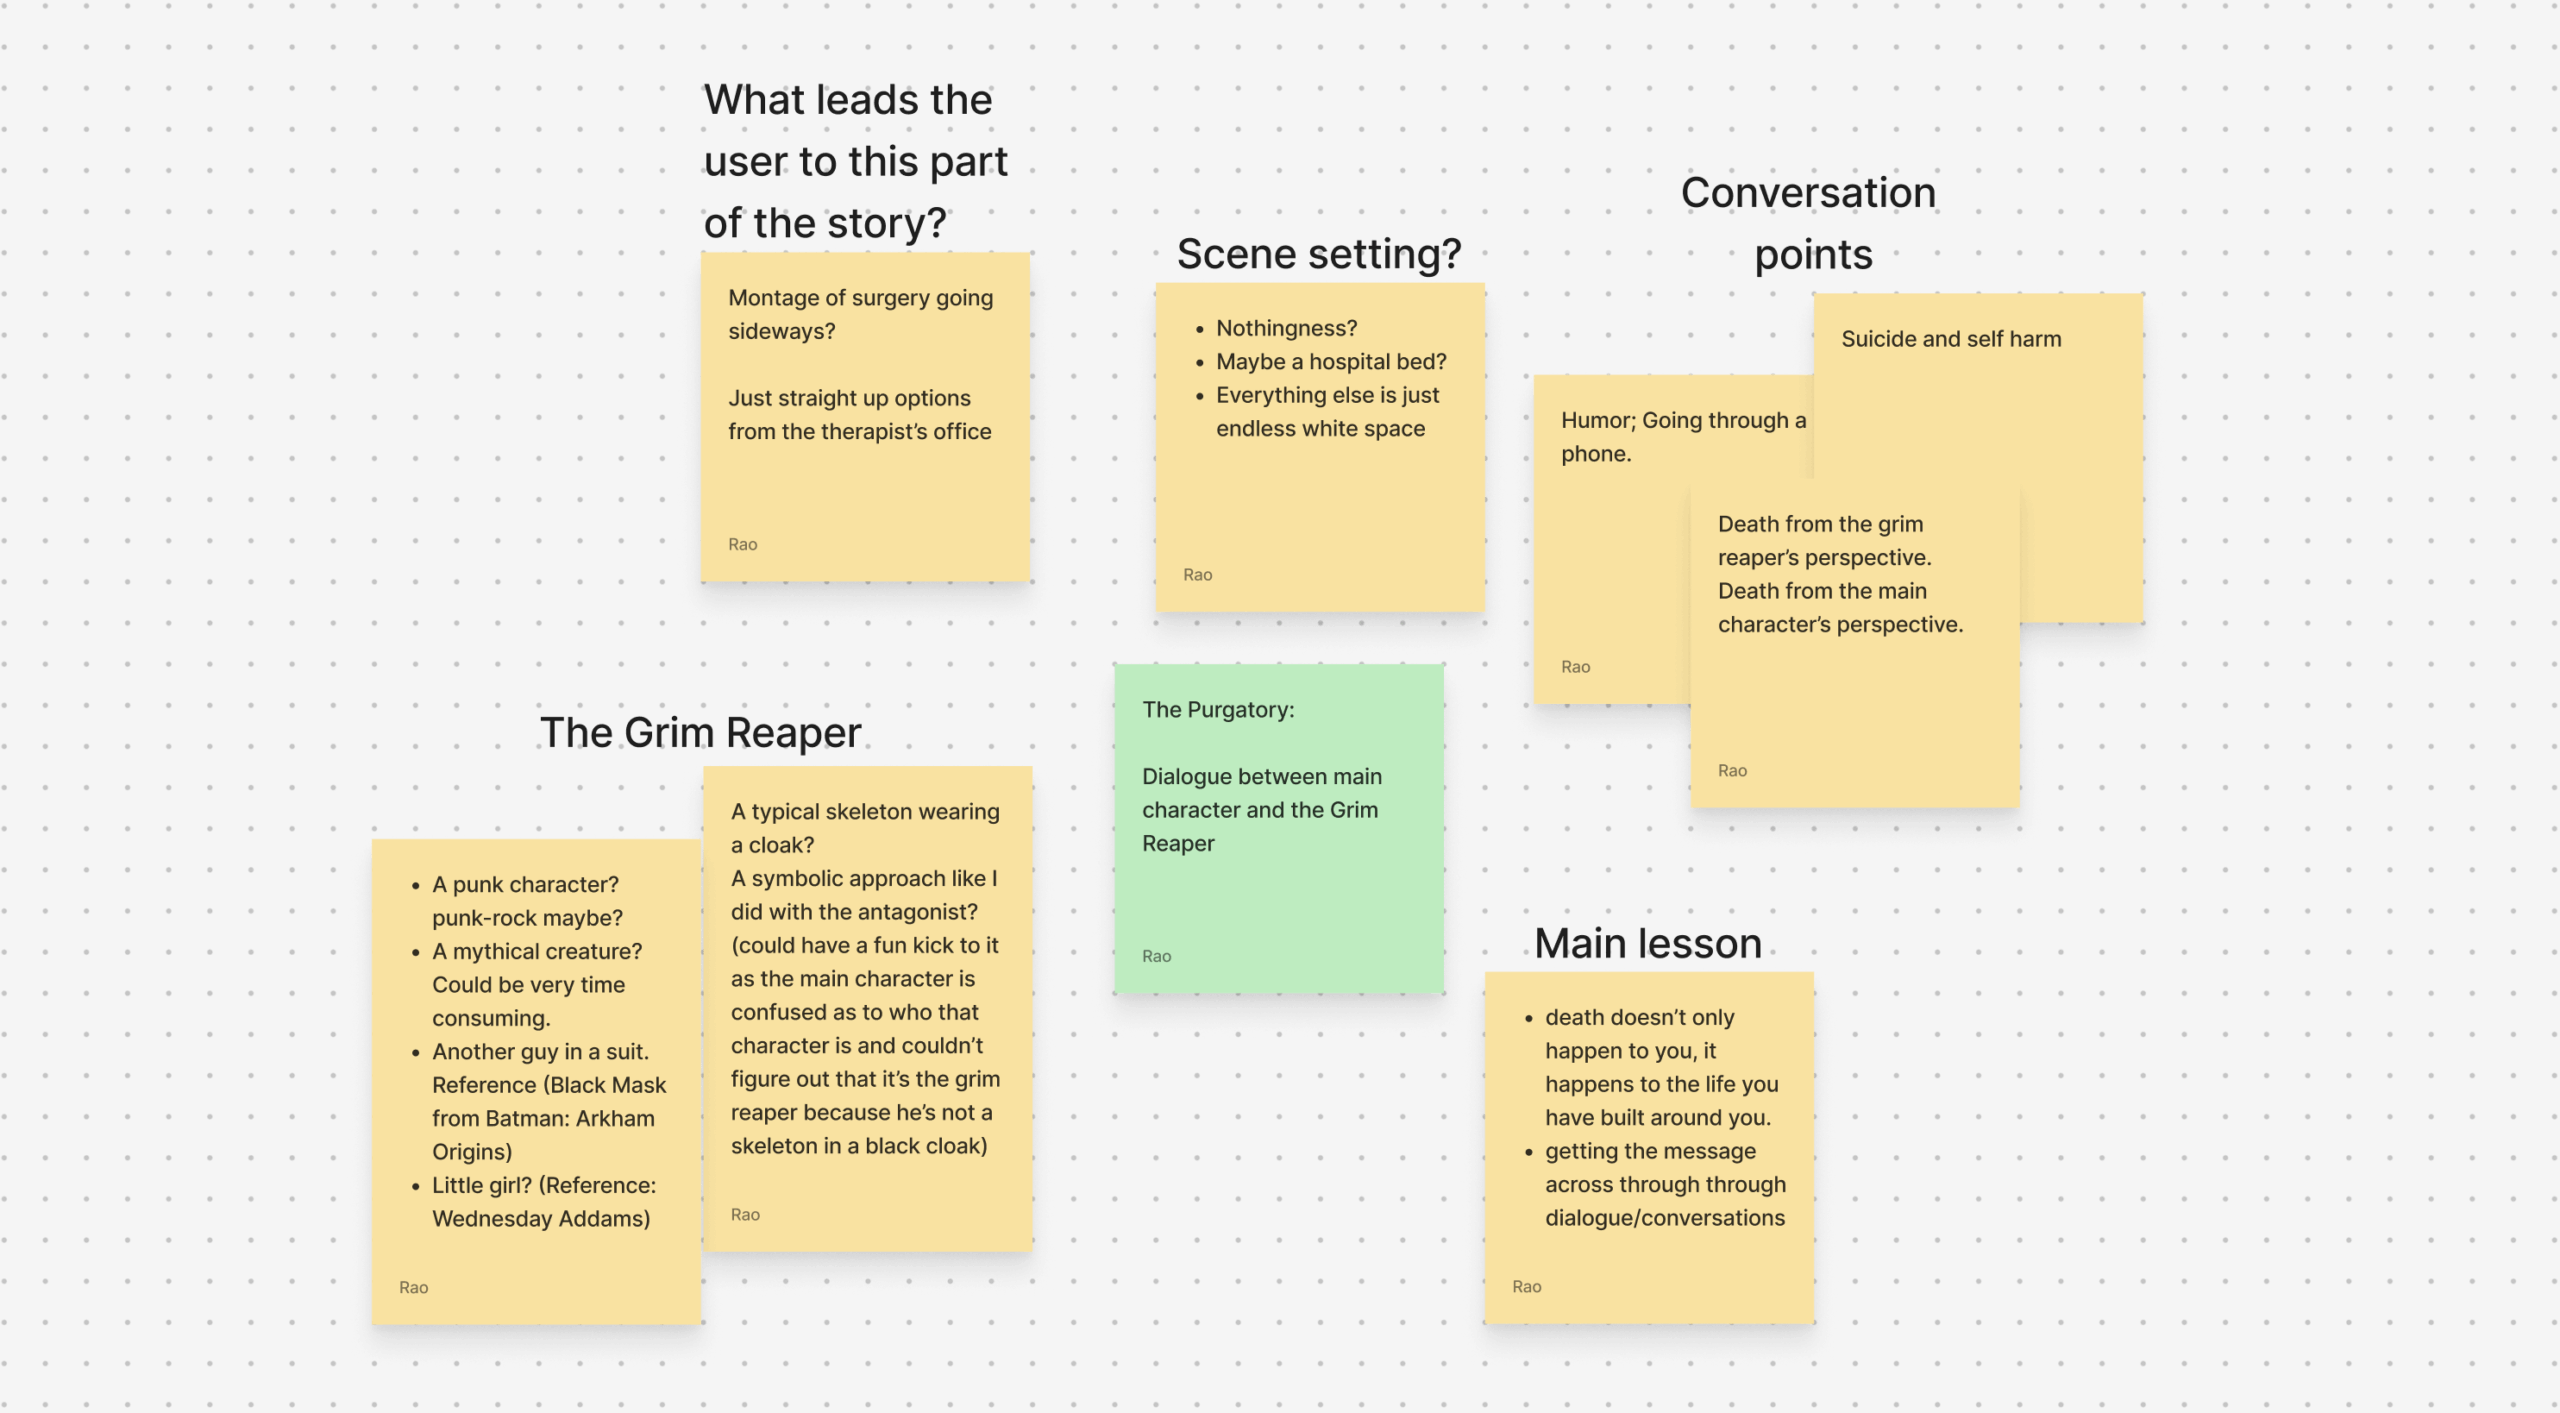
Other than the soundtrack, I did some brainstorming to further progress on my narrative. With the sequence of events I put down in the last week, I picked one of the events to start expanding on. When I started thinking, I was all over the place, so I simply started writing them down as sticky notes. Whatever I was thinking, I just started laying them out. After that, it started to take shape as categories so I sorted them into categories like the scene setting, some conversation points, the main lessons I need to get across, and the characters involved in the scene. Another thing I want to do is, to keep a balance between impact and entertainment. I am trying to fit in some humor to the rather dark situation to give it some light optimism, which is a reflection of my own personality, as I often tend to lighten the tension when things tend to go hard (That’s what she said..). I am trying to have the scene set up in a harshly empty environment (basically no background), to put more emphasis on the two characters and the dialogue.
To put it down in a short summary, it is a Purgatory scene where the main character is having a dialogue with a grim reaper or angel of death or death itself, whatever I end up calling it eventually. (I don’t have the final visual form for that character, but I have a few ideas. A promising idea I had while having a discussion about this with Austin during one of our independent study meetings is giving it a changing form, so it appears in different forms based on the story, but I think it would be decided once I start working on other parts of the narrative.) They mainly talk about death from different perspectives. The main character is coming from a place where he is exhausted from all the medical procedures, each one more intense than the last in terms of pain and suffering, which is making him think that it would be easier if he died and all of this just ended. At the young age of 18 he doesn’t realise the bigger picture of the impact that any individual’s death has on the world that’s built around them. This is where the Grim Reaper’s perspective comes in as he tries to make the character realize that a person’s death does not necessarily happen to the person but also the world around them (the people who depend on them and love them). This dialogue is developed to leave an impact on the audience to help them put things in perspective.
In additional research:
In addition to that, I also met with Jared to show him my midterm presentation since he was unable to make it to mine. My goal in meeting him was to get his insights on the project so far and ask him for any suggestions and feedback he might have, primarily on using Figma as a prototyping tool, or if he has any other suggestions. He did tell me about some of the other game engines out there that he suggested I look into if I haven’t already.
- Visual Novel Maker1is a game‑creation engine tailored for crafting visual novels and interactive story‑driven games. It features a user‑friendly drag‑and‑drop scene editor plus a database system for characters, backgrounds and audio, while still allowing advanced users to add custom scripting in CoffeeScript or JavaScript and even extend the editor itself. The program supports multi-platform export (Windows, Mac, Linux/Ubuntu, Android, iOS, HTML5) so you can deploy your story to desktop, mobile, and the web. It also includes built-in assets (characters, backgrounds, music, sound effects) to help you get started right out of the box, and it supports features like animated Live2D models with voice‑sync, layered audio & movie effects, and localization tools (text export, alternate images per language) for global release.
- iFAction Game Maker2 is a visual game‑creation tool developed by iFAction Studio that lets users build games without traditional programming by using drag‑and‑drop and visual workflows. It supports multiple game‑modes, including action (ACT), action‑RPG (ARPG), and visual‑novel/AVG‑style games, with built-in triggers (for dialogues, weather, spawn systems) and a script editor (JavaScript) for more advanced usage. The engine enables rapid resource import and scene building, with automatic layer and occlusion handling. It also includes support for modding and customization, as well as export to PC, web, and Android (with iOS support planned). The system requirements are modest (Windows 7 / 8 / 10 64-bit, Intel i3 or better, 2 GB RAM minimum), and user reviews are “Mostly Positive”.
- GDevelop 53 is a free, open‑source game‑creation engine designed to let creators build 2D (and now basic 3D) games without needing to write traditional code—it uses a visual “events” system composed of conditions and actions to control logic. It supports a wide array of built-in features such as tile‑maps, behaviors (platformer character, path‑finding, physics), particle and visual effects, layers and cameras, input (touch, mouse, keyboard), audio/sound, and export to multiple platforms including Windows, macOS, Linux, Android, iOS and HTML5. For more advanced users, you can add JavaScript code blocks, create your own functions and extensions, and integrate third‑party services (ads, leaderboards, Firebase). GDevelop is therefore suited for beginners wanting to prototype quickly as well as more experienced developers who wish to extend the engine, all without the need for major licensing fees.4
Coming up next…
- Moving on, I will start writing a script for the purgatory scene, and once I have a linear narrative, I will incorporate choices to figure out different ways the narrative can be presented.
- As I script, I think I will also start some brainstorm sketches to figure out the different forms the Grim Reaper’s character can be portrayed.
- I will also further research the game engines I listed here. The descriptions I have written here provide an overview of what these engines are for and offer a basic understanding of their functionality.
Bibliography:
1: https://www.visualnovelmaker.com
2: https://store.steampowered.com/app/1195270/iFAction_Game_Maker/